GitLab
Our GitLab integration collects metadata about your organization’s activity across repositories, pull requests, and deployments. We never read, transmit, or store source code. Sensitive data, such as branch names and pull request titles, are always encrypted.
Permissions
We request only the necessary permissions to analyze Git metadata. Below is a description of the scopes requested when connecting to GitLab:
- api: Read/write access to the API, including all groups and projects, the container registry, the dependency proxy, and the package registry.
Due to limitations in GitLab’s scopes, our platform requires api, not read_api, in order to install webhooks on each project. Please note that we never read, transmit, or store source code. We also do not edit or modify code or files.
You can learn more about scopes for authorized applications in GitLab’s documentation .
Connecting Self-Managed GitLab
Our platform supports both GitLab Cloud (your user account is on gitlab.com) and GitLab Self-Managed (your organization administers and maintains its own GitLab instance).
Before you begin: Please verify that you are an owner of the GitLab group you wish to connect to Antenna. If you’re not an owner, invite one to help set up your account. If you have IP restrictions enforced, please contact us at support@antenna.dev.
To connect a self-managed GitLab instance, select GitLab from our available integrations. You can add GitLab from your organization’s settings by navigating to the Settings view in the Antenna app and selecting the Connected Apps tab.
You will be asked to choose the type of GitLab instance your organization is running. Select Self-Managed.
We authenticate to your GitLab organization using an OAuth connection. All groups to which you have access will be synced. If you don’t have access to all of your organization’s groups, invite an admin to set up the application on your behalf.
Follow the steps below to connect GitLab:
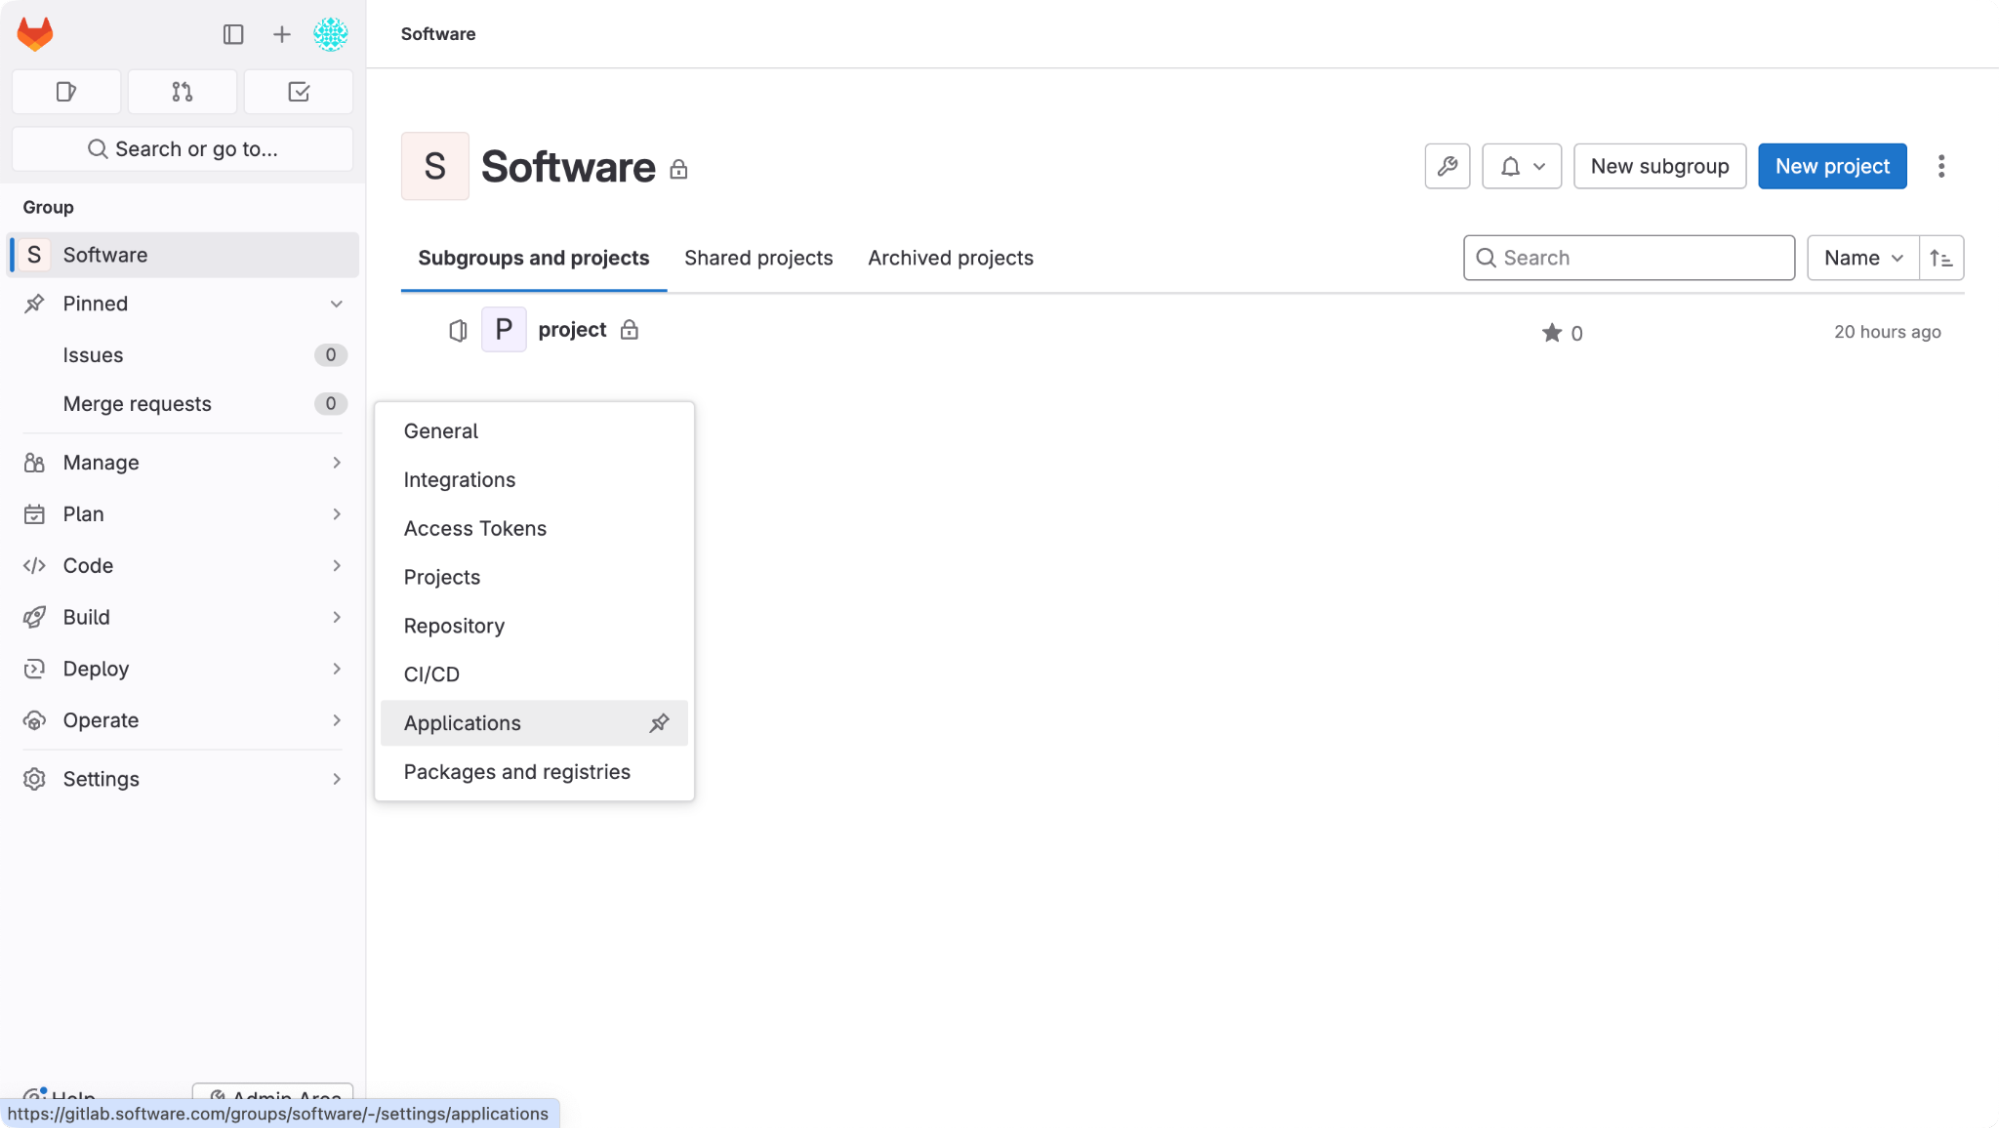
- Select a Group. You can install Antenna on any group.
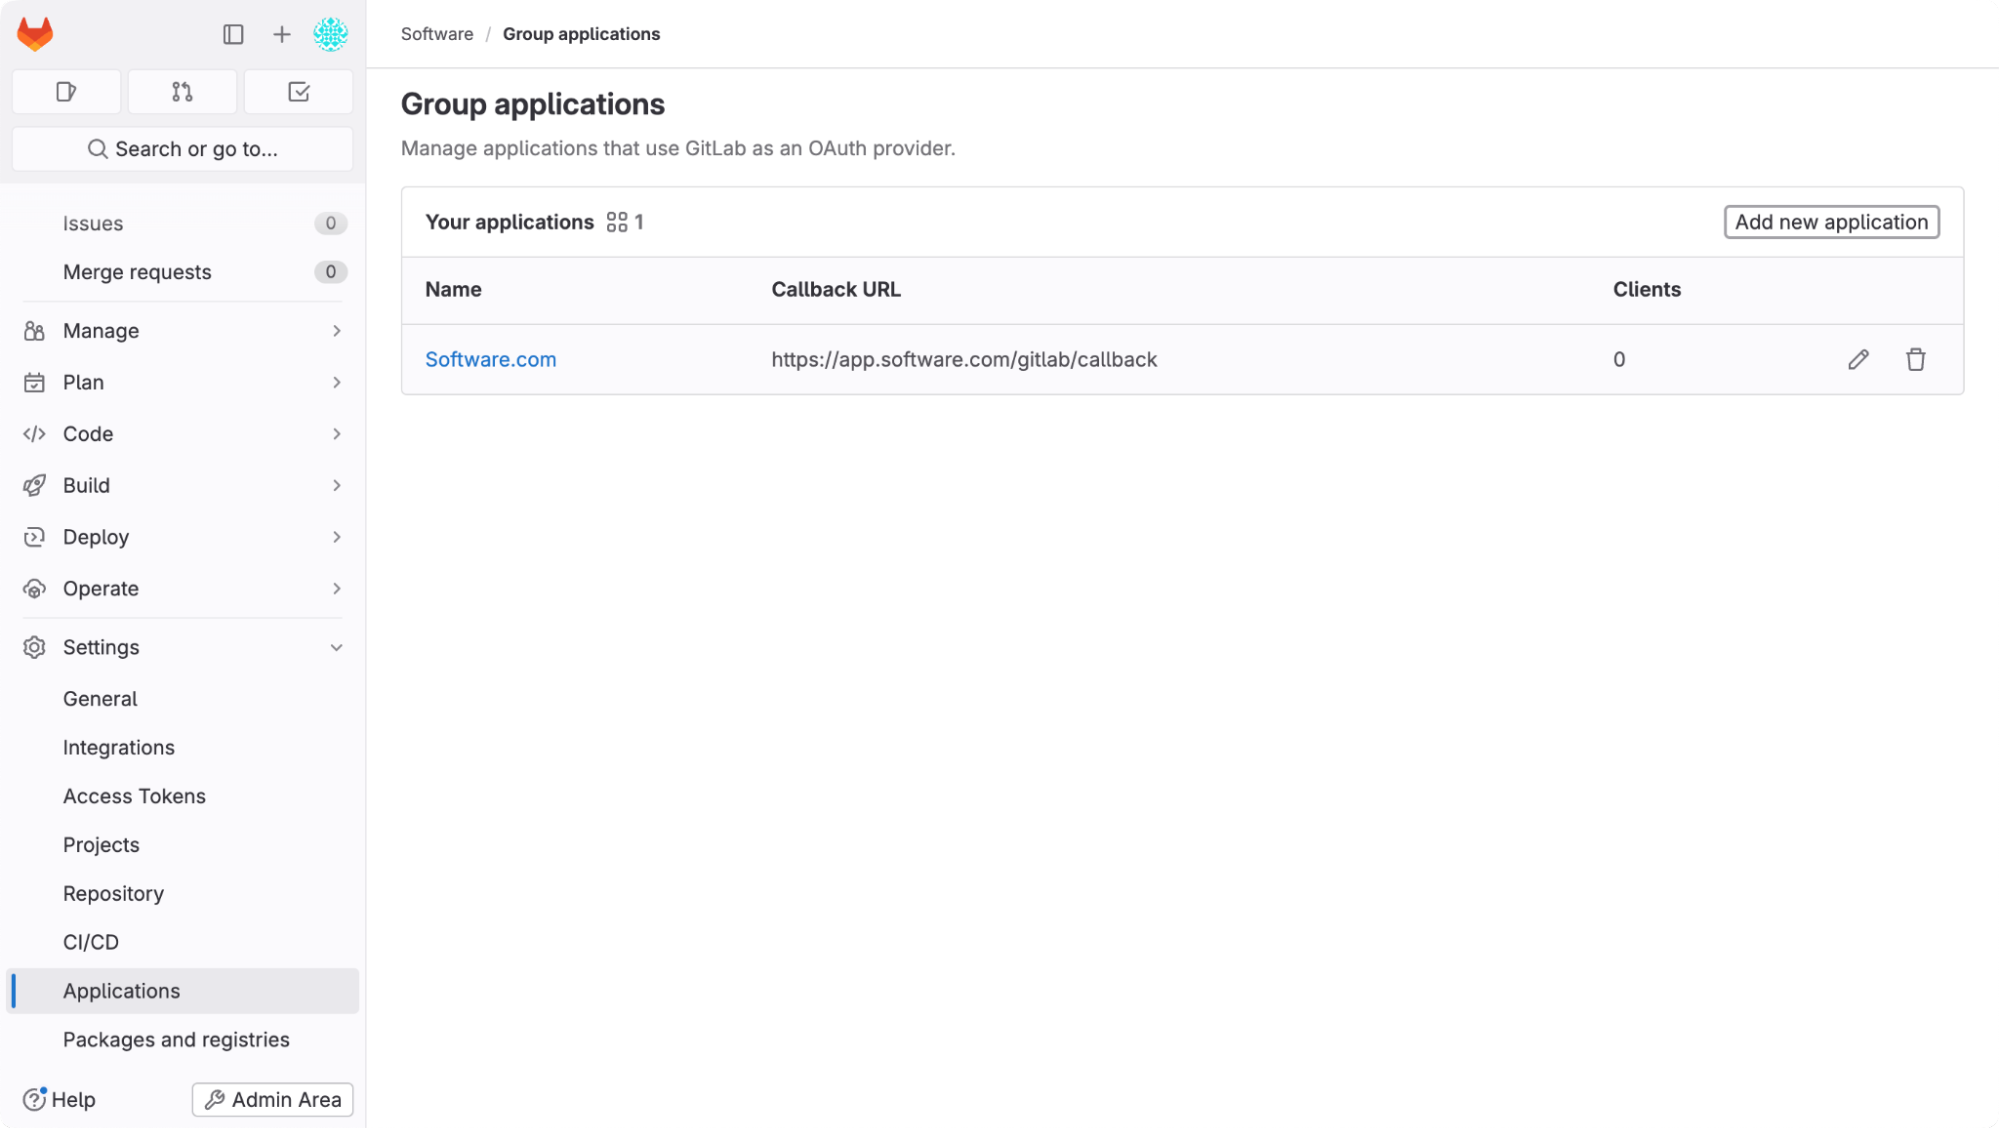
- Select Settings, then Applications in the left sidebar.
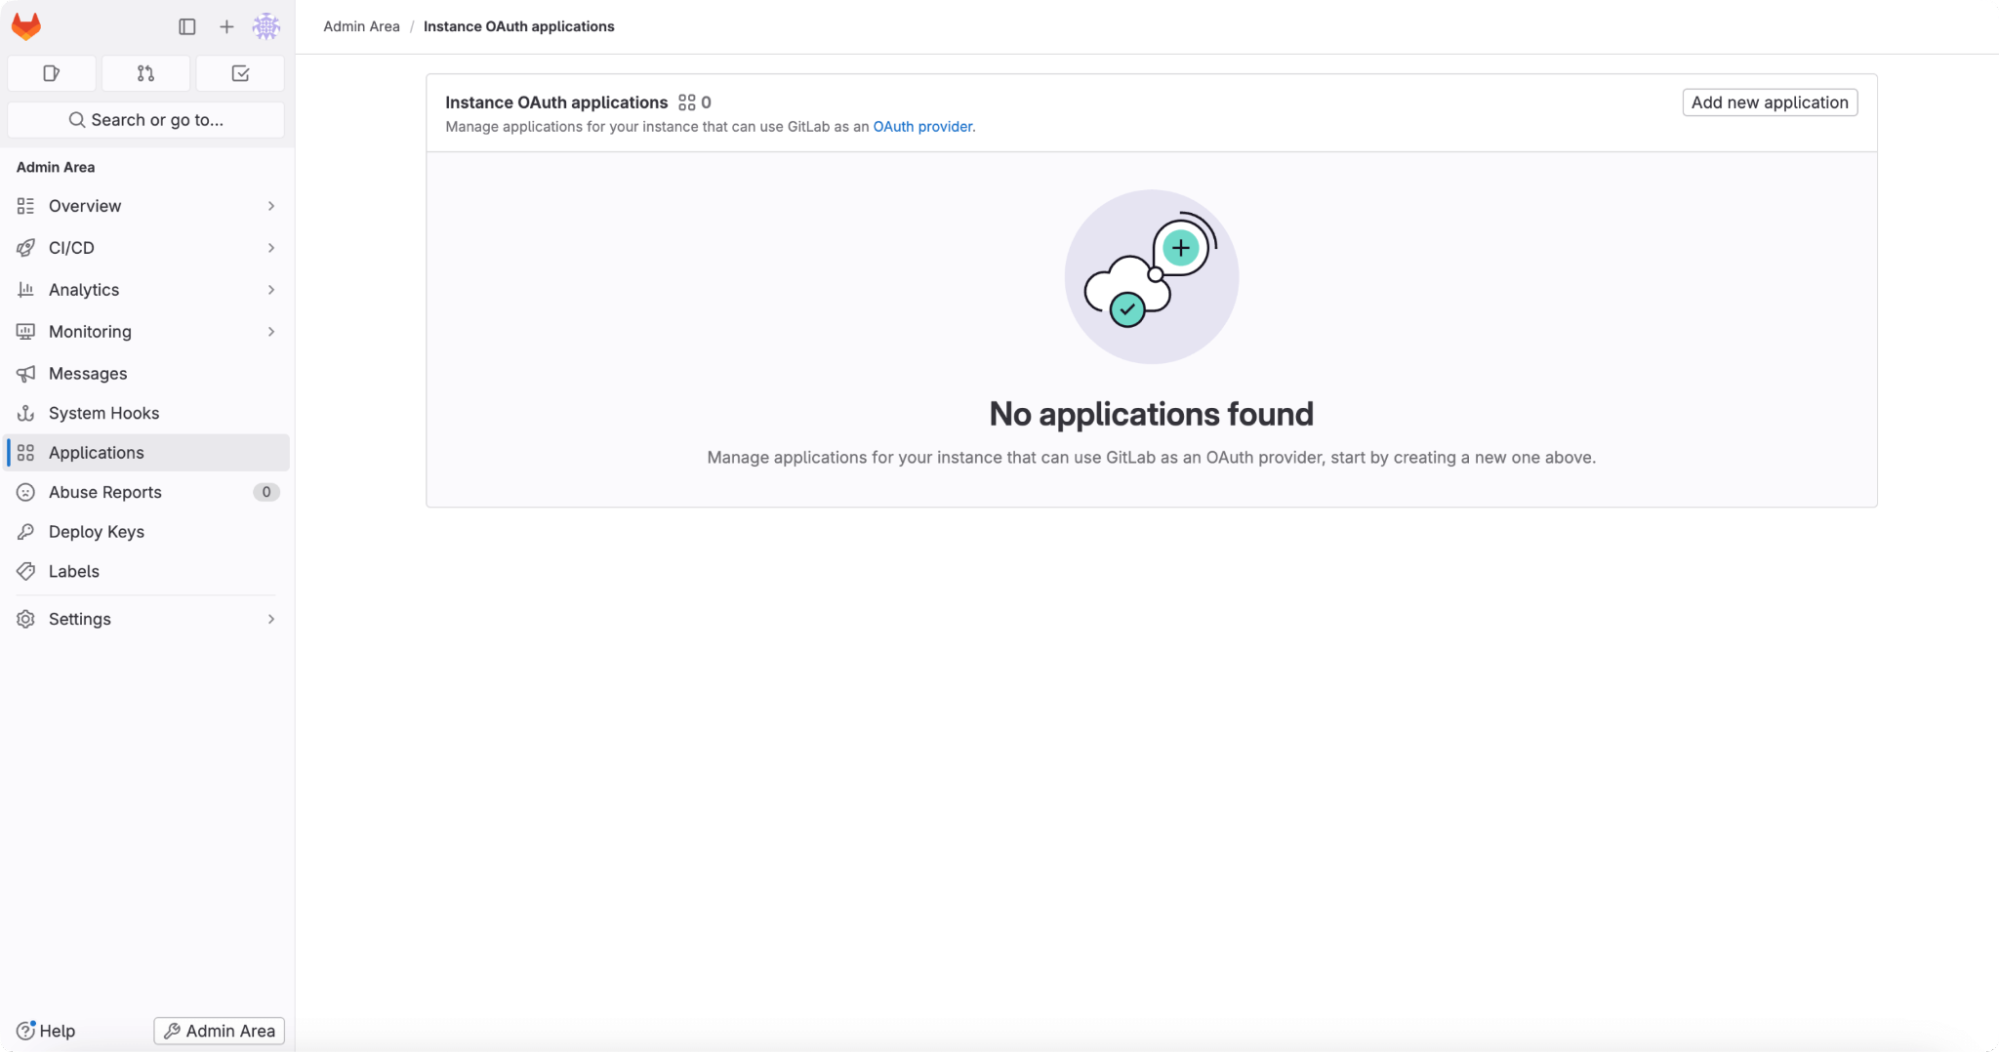
- Click Add New Application.
- Enter the information below to create the new Group application:
- Name: Antenna
- Redirect URI: https://app.antenna.dev/gitlab_onboarding/create
- Confidential: checked
- Scopes: api
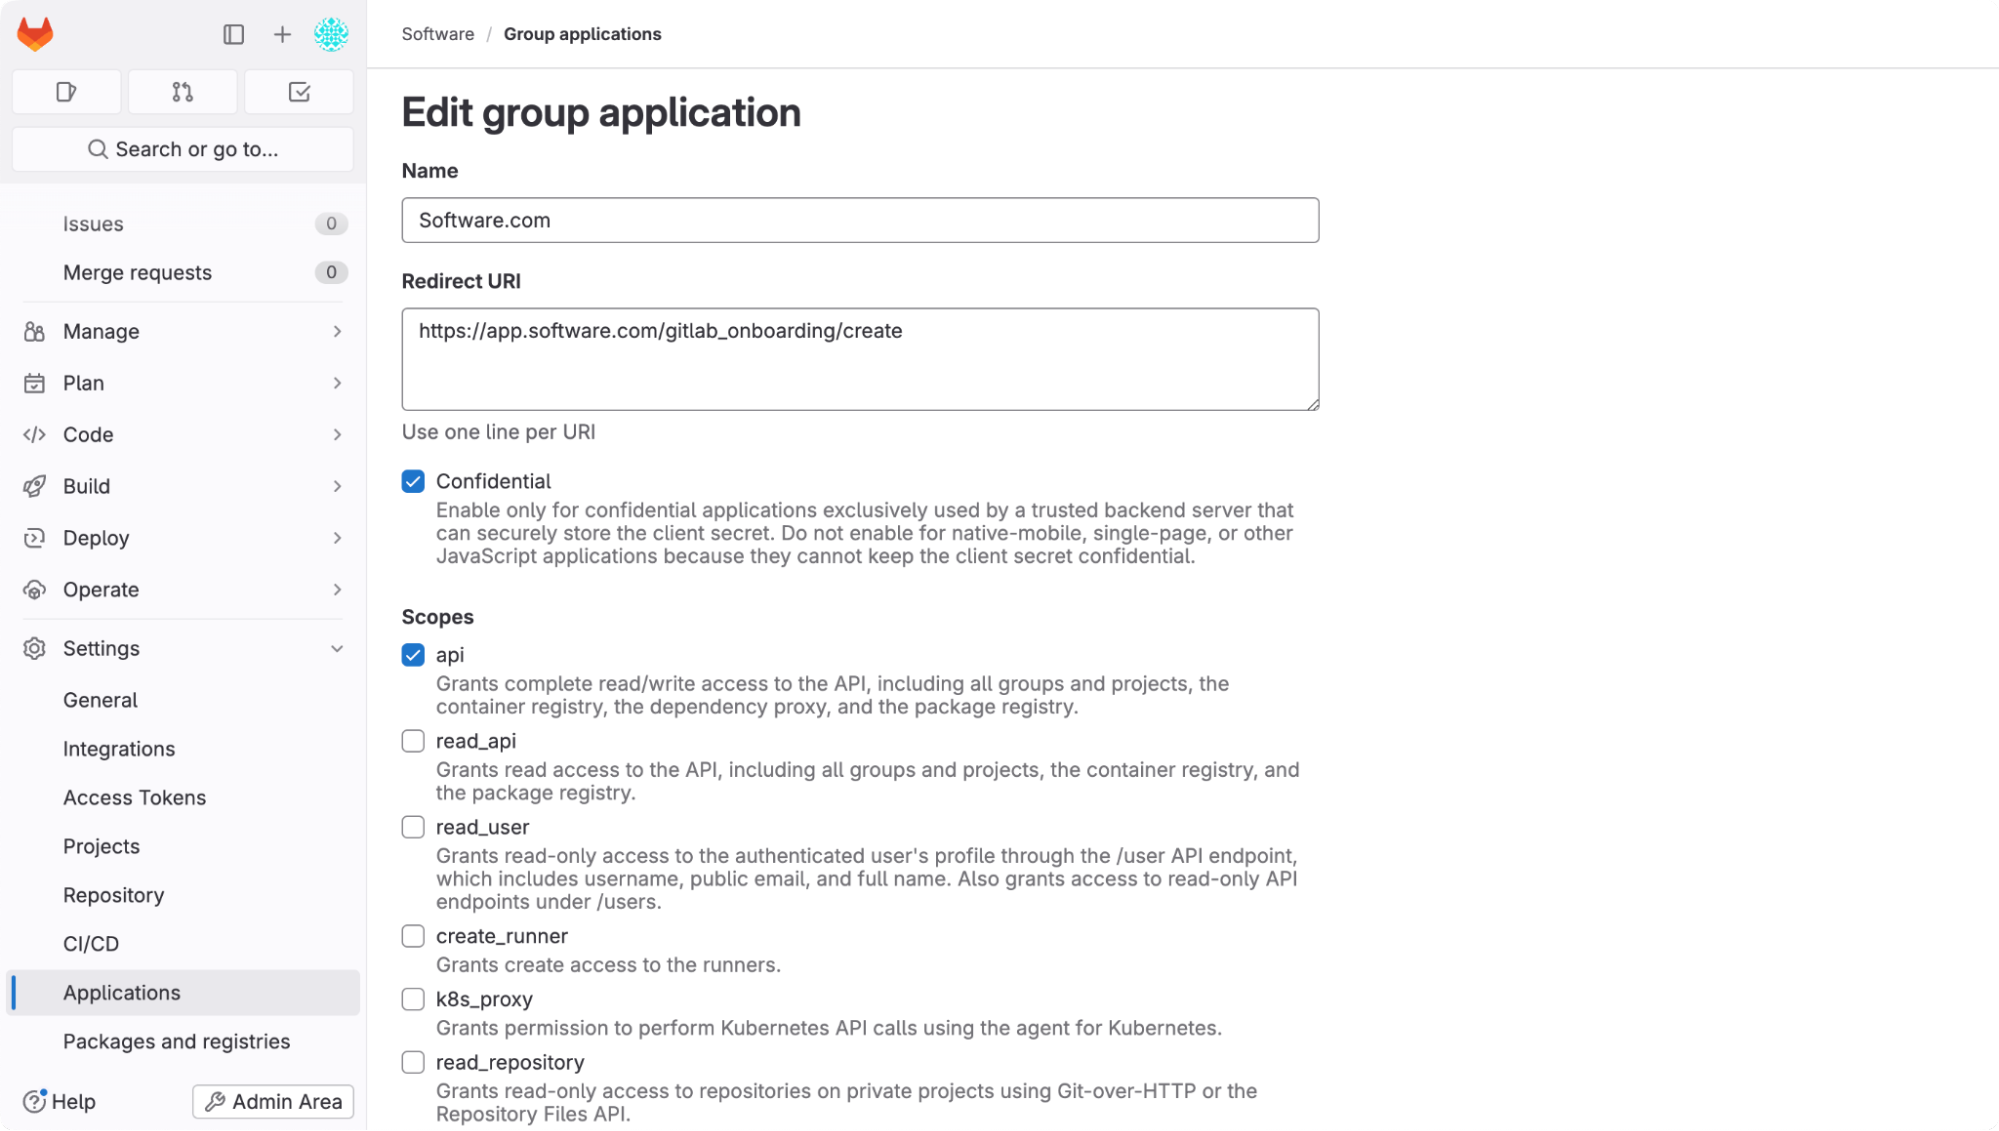
Due to limitations in GitLab’s scopes, our platform requires api, not read_api, in order to install webhooks on each project. Please note that we never read, transmit, or store source code. We also do not edit or modify code or files.
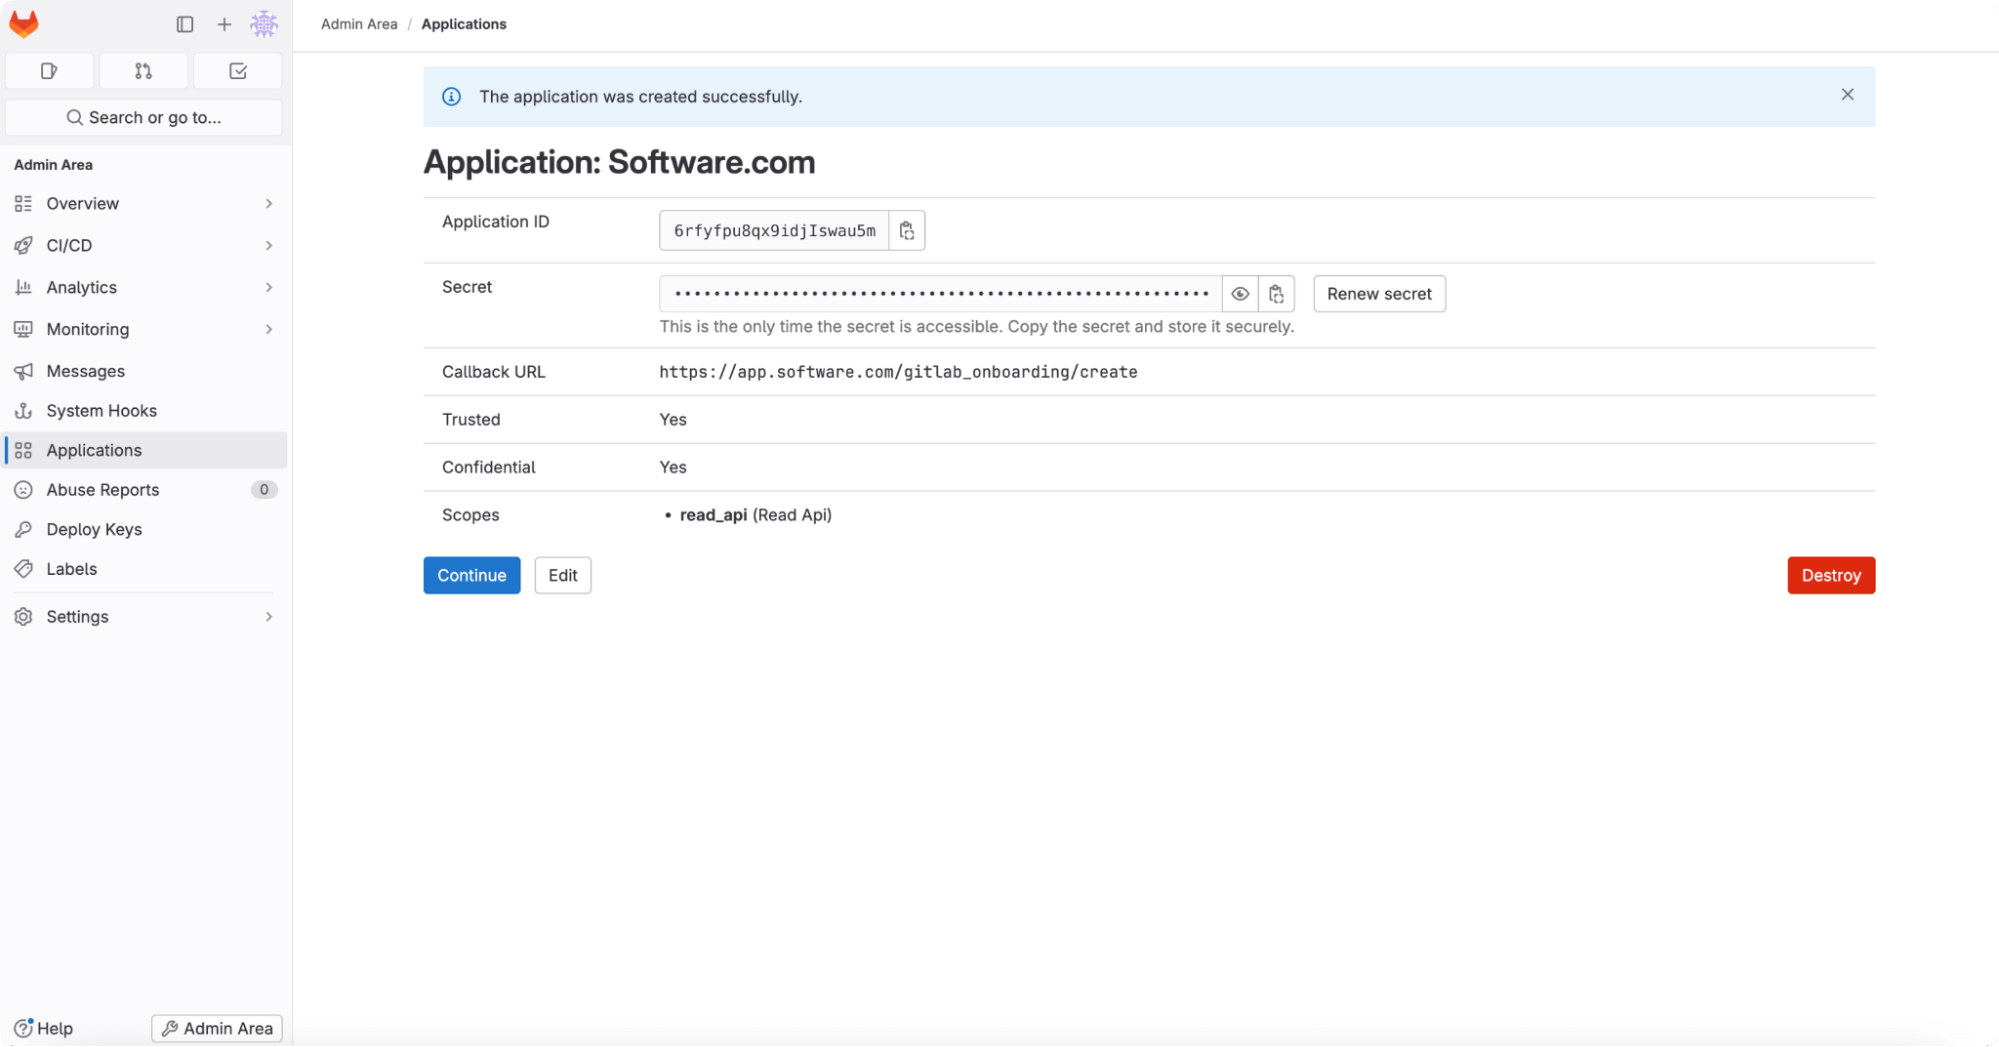
- Click Save Application to generate application credentials.
- Copy the Application ID and Secret. Store these credentials securely, as they can not be accessed again later. Only select Continue once you have these copied and stored securely.
- Navigate back to Antenna and paste the Application ID and Secret. Click Save.
- Activate your GitLab App. You will be redirected to authorize Antenna to access your account.
After connecting, you can manage your GitLab integration from the Applications page.
Connecting via Private Network (VPN)
Some organizations run GitLab on their own infrastructure with no cloud provider involved and need a dedicated, encrypted connection to Antenna instead of a standard internet-based integration. For these organizations, we support an AWS Site-to-Site VPN (IPsec) tunnel between your network and Antenna. You don’t need an AWS account, only a VPN-capable firewall or router.
Our GitLab integration works in both directions: Antenna calls your GitLab API to pull data, and your GitLab instance sends webhook events to Antenna. The tunnel setup accounts for both paths.
This setup is intended for organizations with a compliance requirement for a private network connection. If you don’t have this requirement, use the standard OAuth connection described above instead.
What We Need From You
Send the following to your Antenna account contact to get started:
- Public static IP of the firewall or router that will terminate the VPN tunnel on your end. This IP must be static.
- BGP ASN, only if you want dynamic (BGP) routing. If you don’t provide one, we use static routing.
- Internal CIDR range where your GitLab instance lives, for example
10.10.2.0/24. - GitLab internal hostname or IP and port, for example
gitlab.internal.yourco.com:443. This is the address Antenna calls. - VPN device make and model, if available. This lets us send you a ready-made configuration template instead of generic parameters.
- Confirmation that your firewall allows outbound UDP 500 (IKE), UDP 4500 (NAT-T), and ESP (IP protocol 50) to our tunnel endpoints.
- Confirmation that your internal firewall or ACLs allow traffic from Antenna to reach your GitLab instance on the port above. We provide the specific source range once the tunnel is live.
What Happens Next
- We create the connection on our end using your public IP and routing preference.
- We send you a configuration file with pre-shared keys and tunnel endpoint addresses, matched to your device if you provided the make and model.
- You apply the configuration to your VPN device and set up both tunnel endpoints for redundancy.
- We confirm together that the tunnel is up.
- You point your GitLab webhooks at the private endpoint we provide, so webhook traffic stays inside the tunnel.
- We verify both API access and webhook delivery end to end.
Access is scoped to the specific GitLab endpoint and port you provide, not your full network.
Questions? Email us at support@antenna.dev.